

PHOTOS: ANDREW FREDRICKSON


PHOTOS: ANDREW FREDRICKSON

eight sucks! For the most part, at least. In this edition of Factory Tech Tip, learn how to shave precious ounces off your race bike.
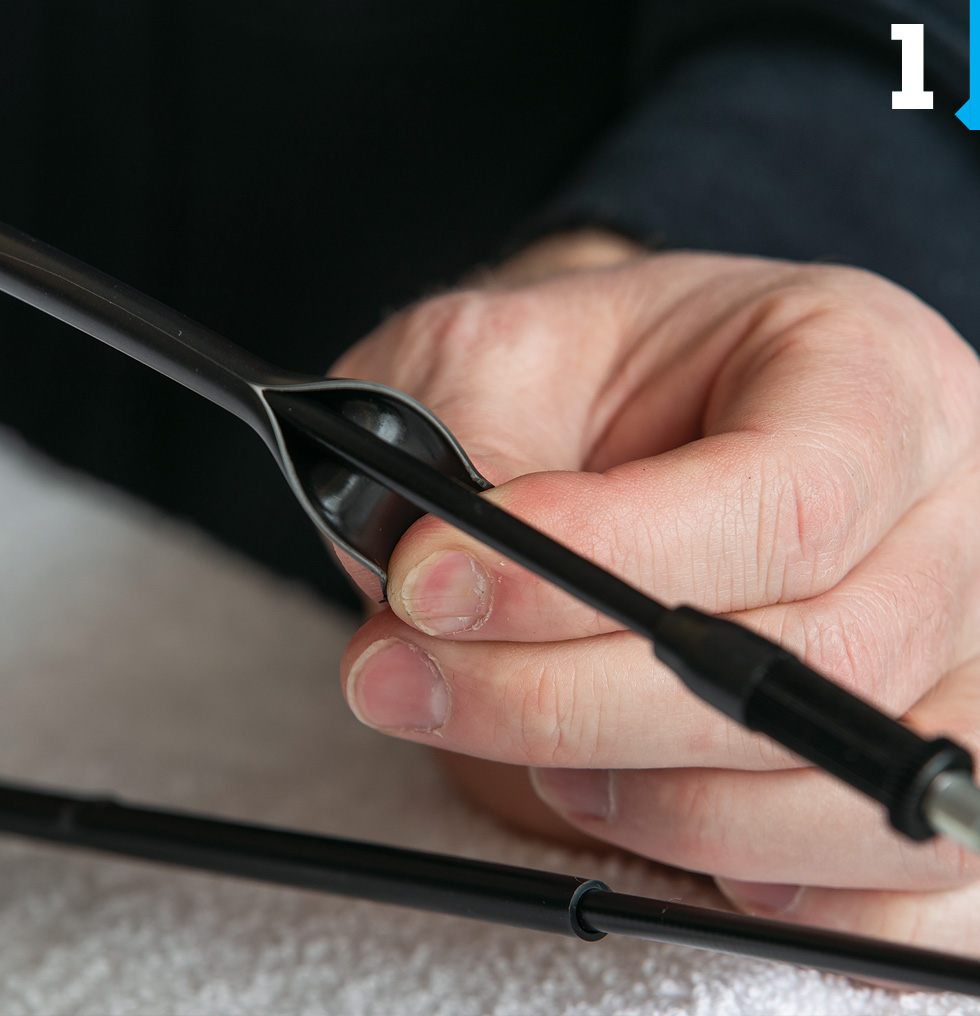
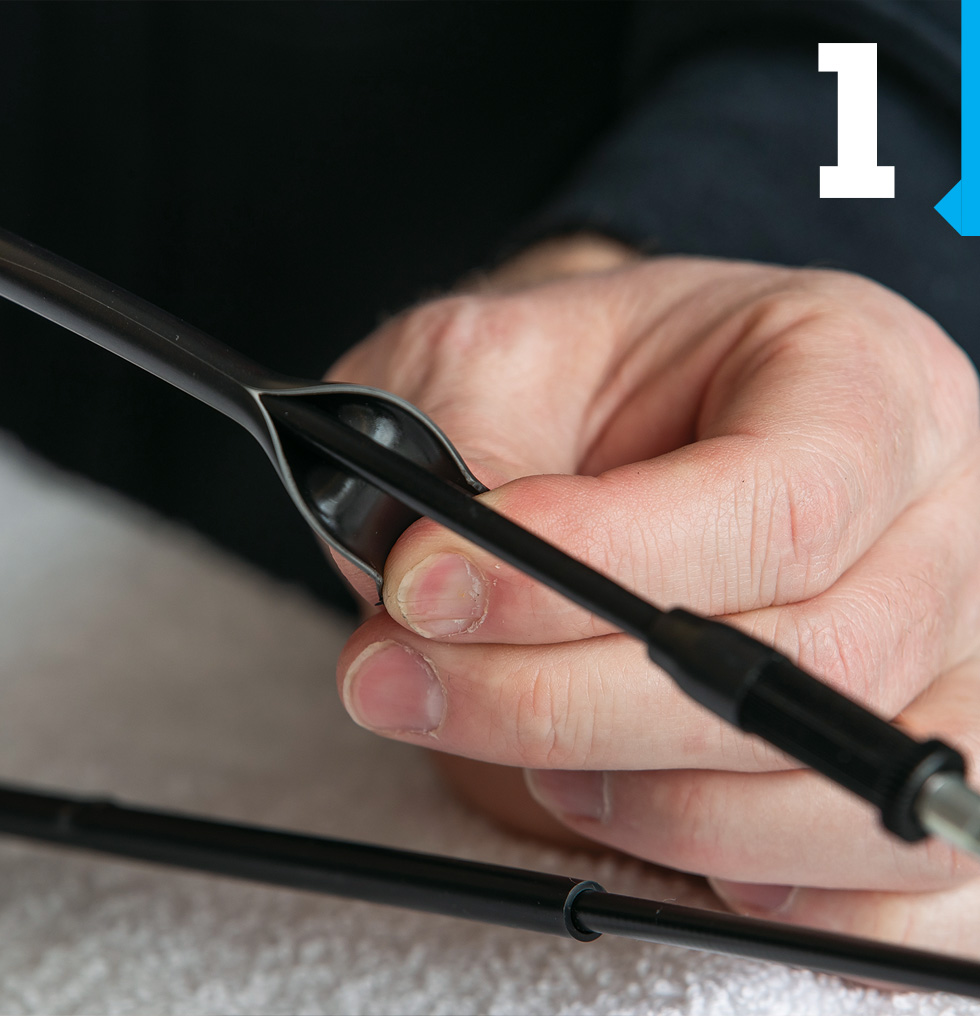
 The very first thing we did was cut the outer casing off of our throttle cables and our clutch cable. You want to score it, not cutting too deep; then you can peel off the outer casing on your throttle cables and remove it, freeing up the cables and lightening the bike.
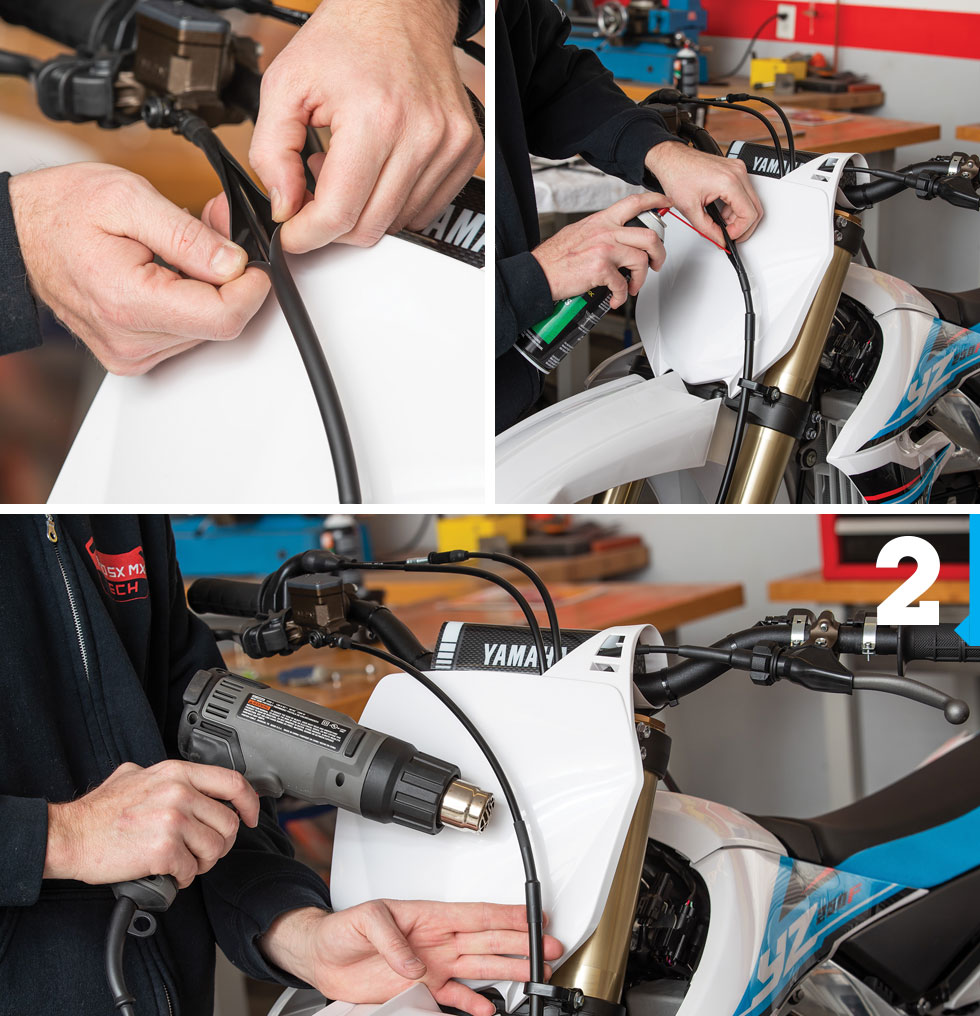
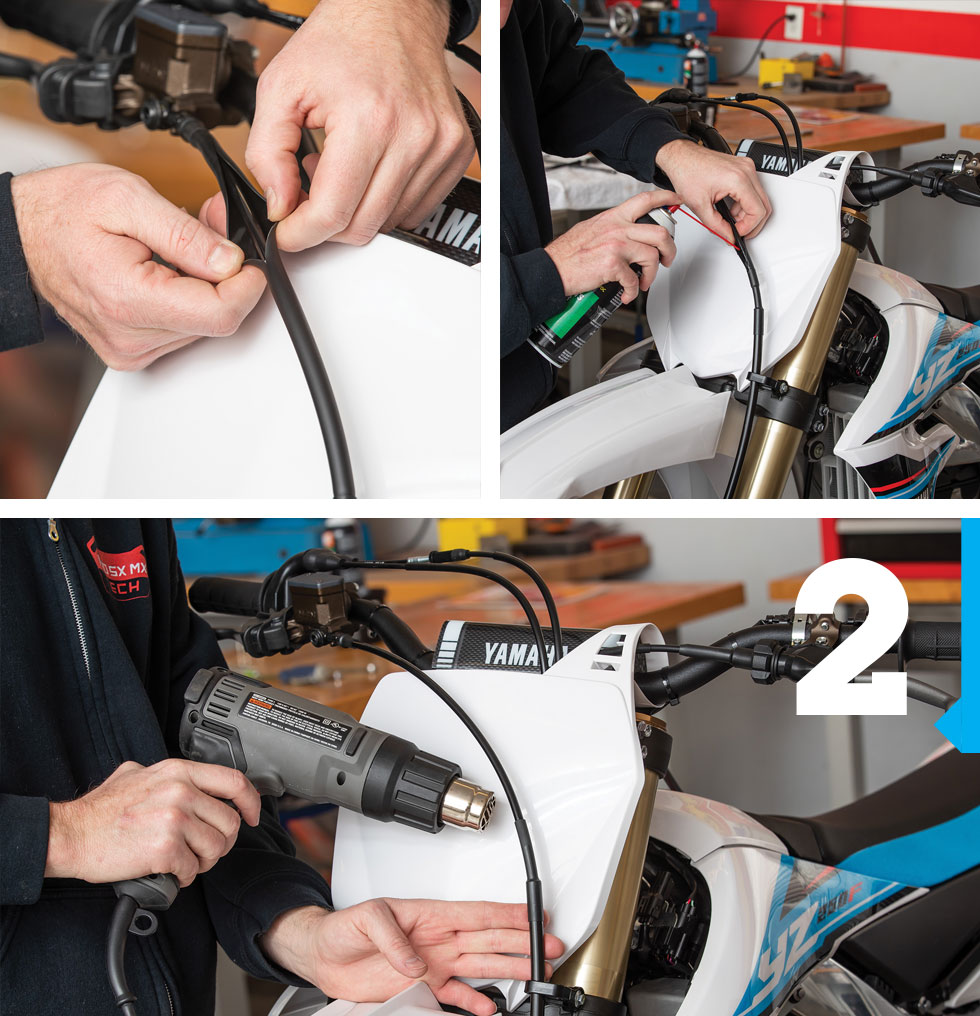
 Next, do the same thing to the front brake line. We cut the upper casing off. I like to leave the lower casing because of rocks and debris down around the tire, but you can eliminate the upper one. We score it, then use a little contact cleaner on the ends to loosen it so you can pull the ends up out of the heat-shrink tubing. Don’t cut the heat-shrink tubing off! You want that to seal and stay on the brake line. Just cut the casing off. Then you’ll get a heat gun out and actually shrink the heat-shrink tubing down even more, creating a nice seal so dirt, debris, and mud can’t get into the brake line.
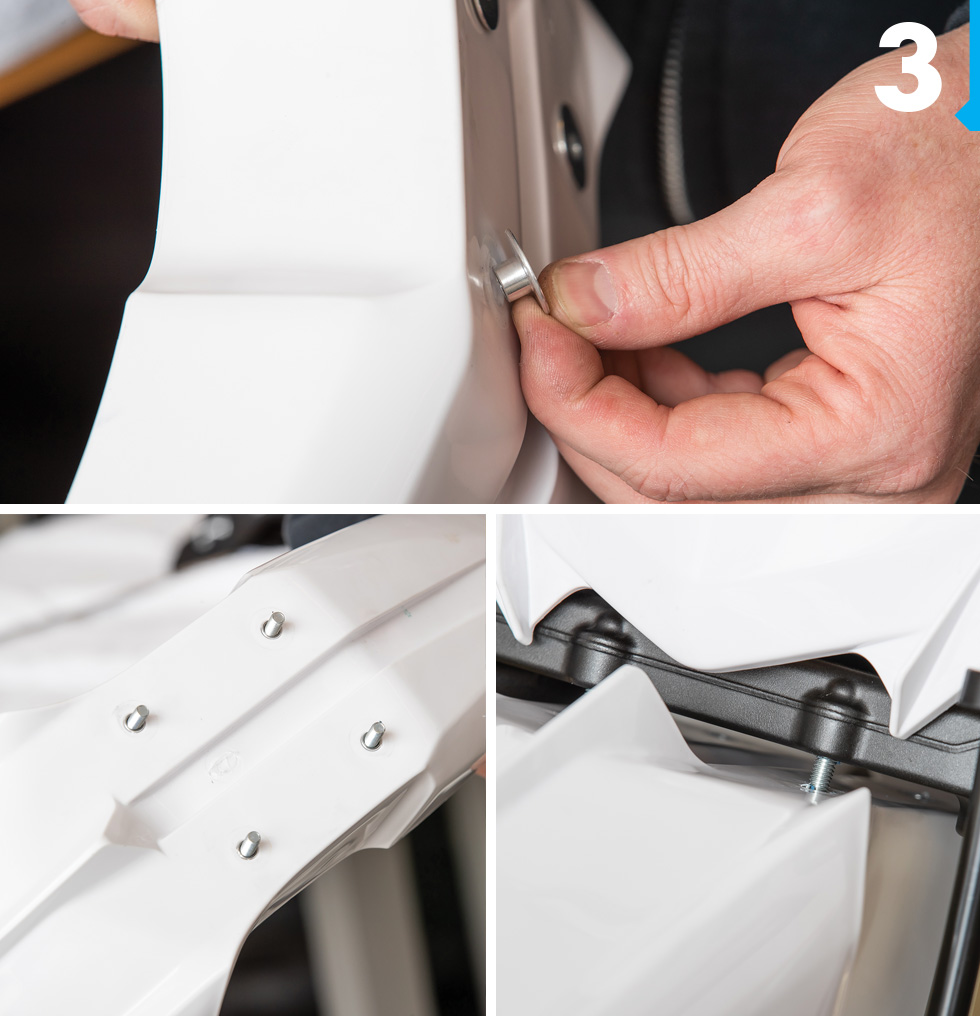
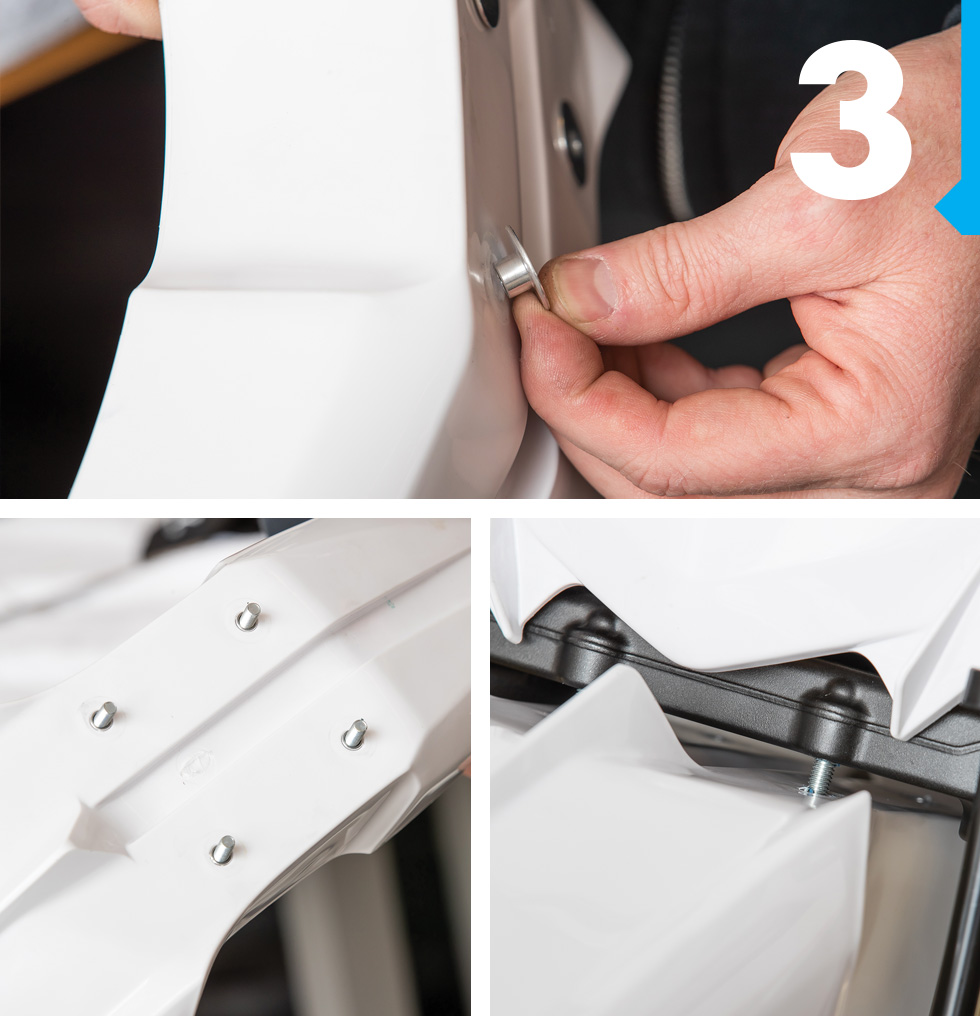
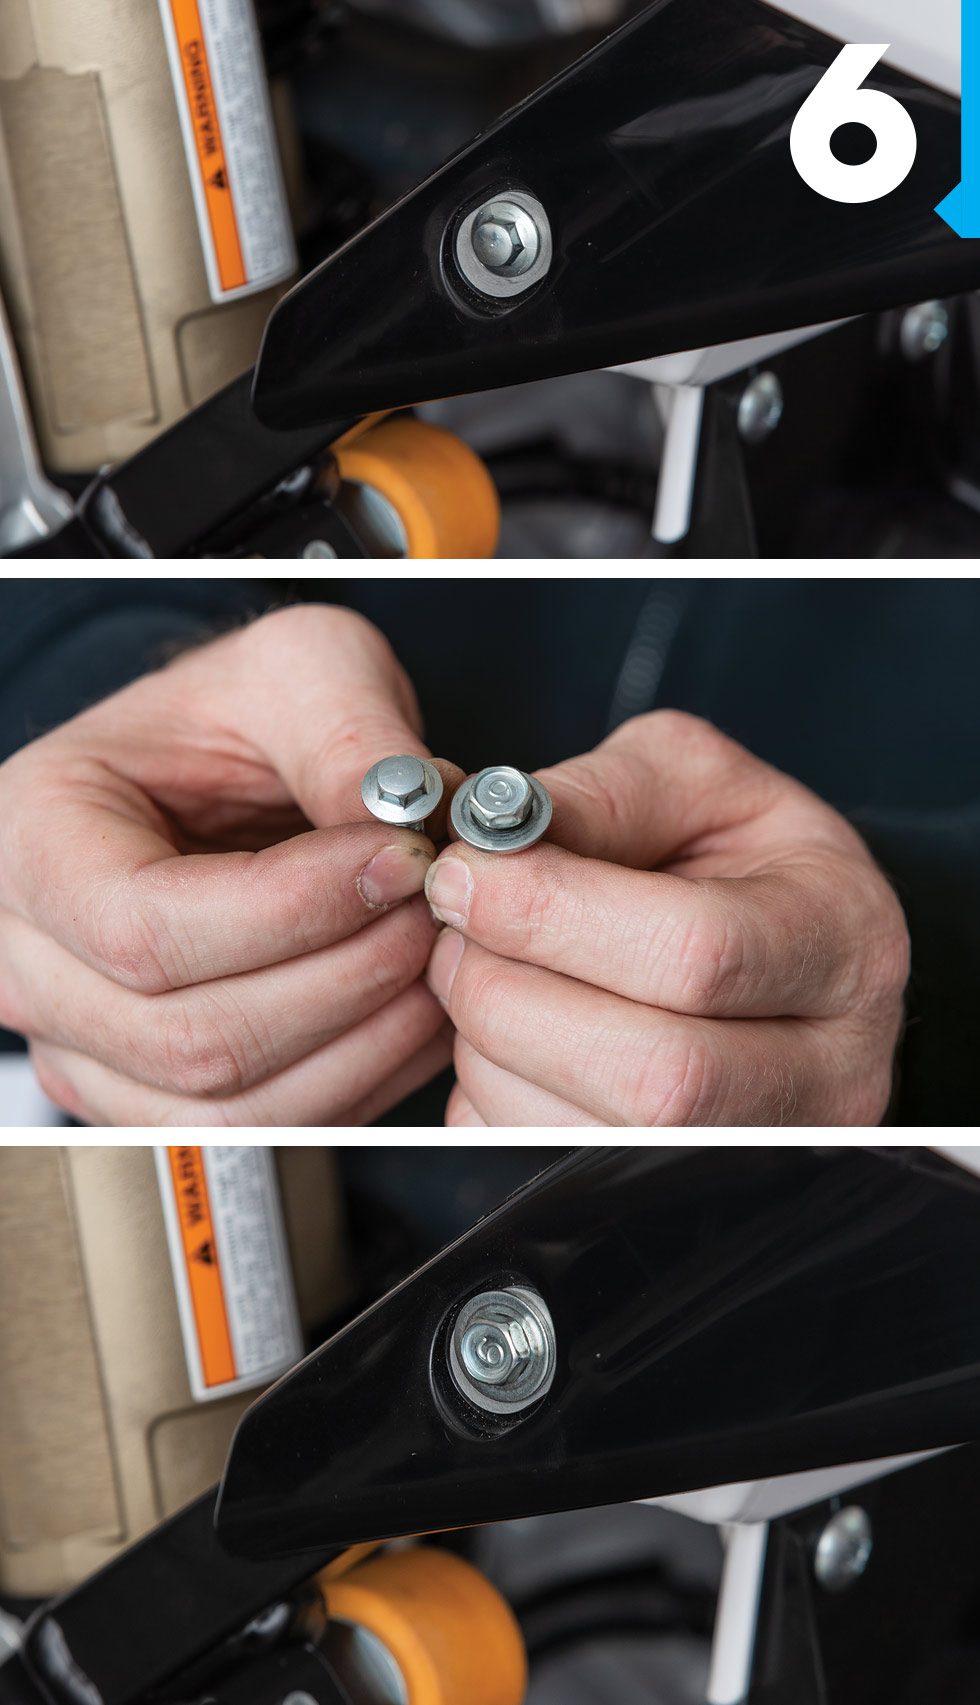
 Next, move to the front fender, where you can eliminate the washers from the bolts. What you can do is actually reverse the collar—the collar goes from the top side down on a stock bike, so we put the collar from the bottom side going up. Then you can eliminate the washer and just run a regular bolt. It makes maintenance and cleanup a lot better because you don’t have to worry about losing the washers, but it also shaves off some valuable weight.
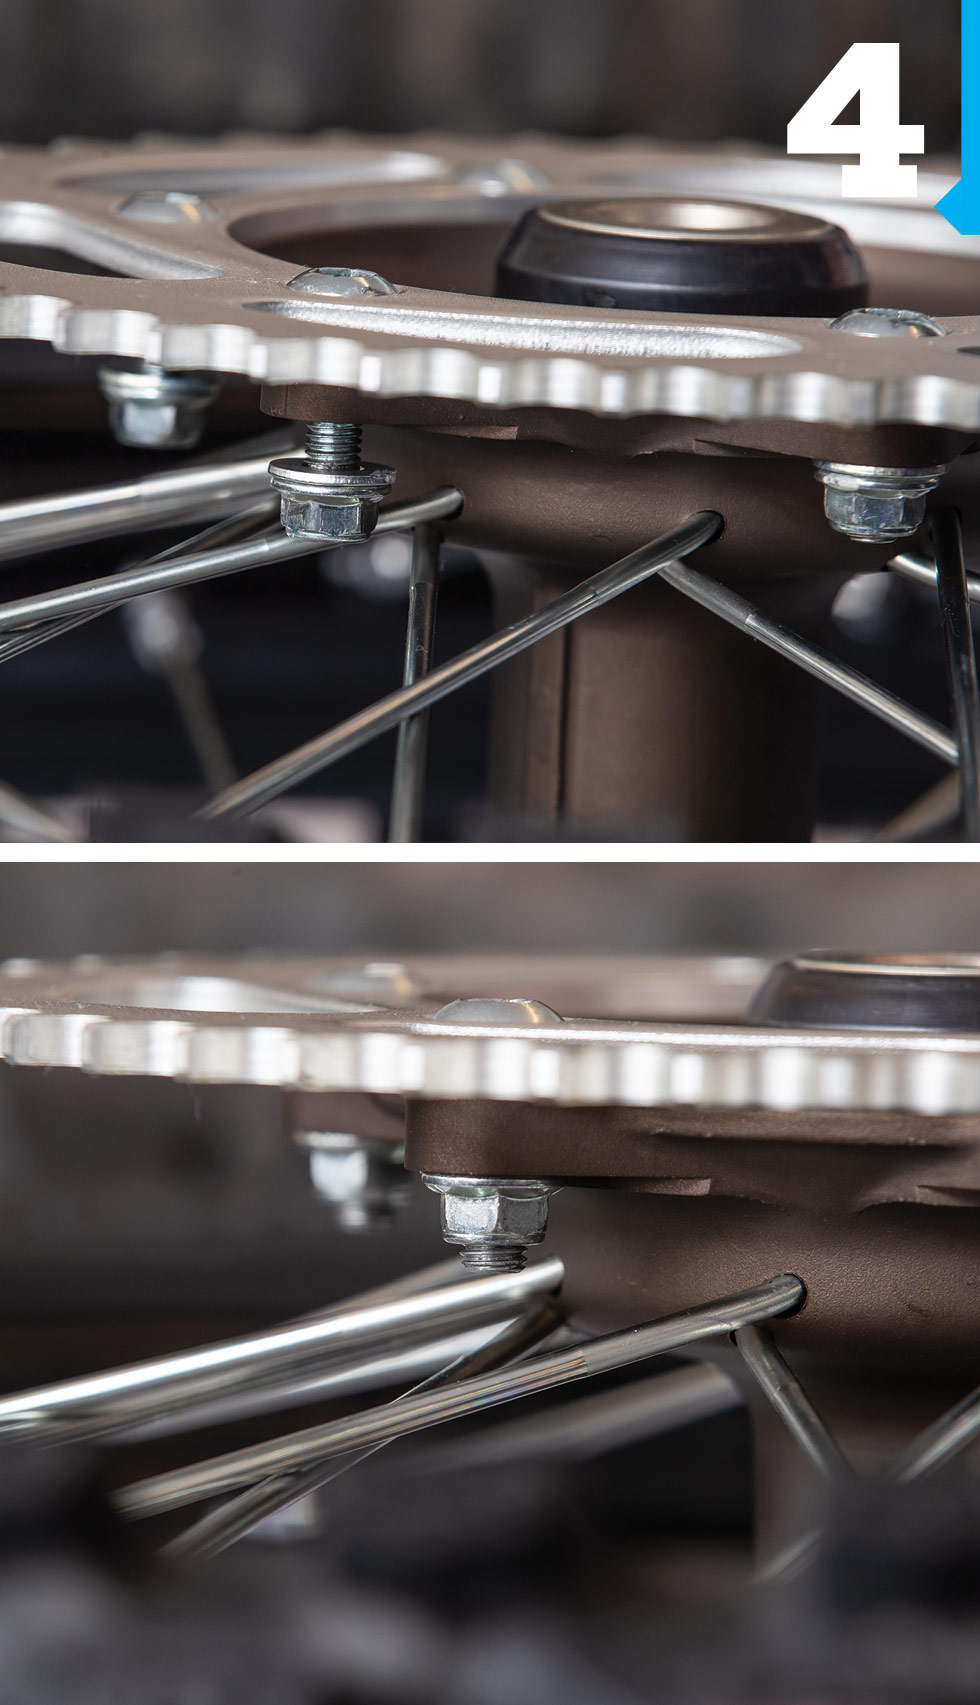
 You can also remove the six washers from the rear sprocket. They’re pretty thick, so this one saves quite a bit of weight. IMPORTANT: If you do remove the sprocket and those washers, make sure you use red Loctite when putting them back together. You definitely don’t want your sprocket coming loose.
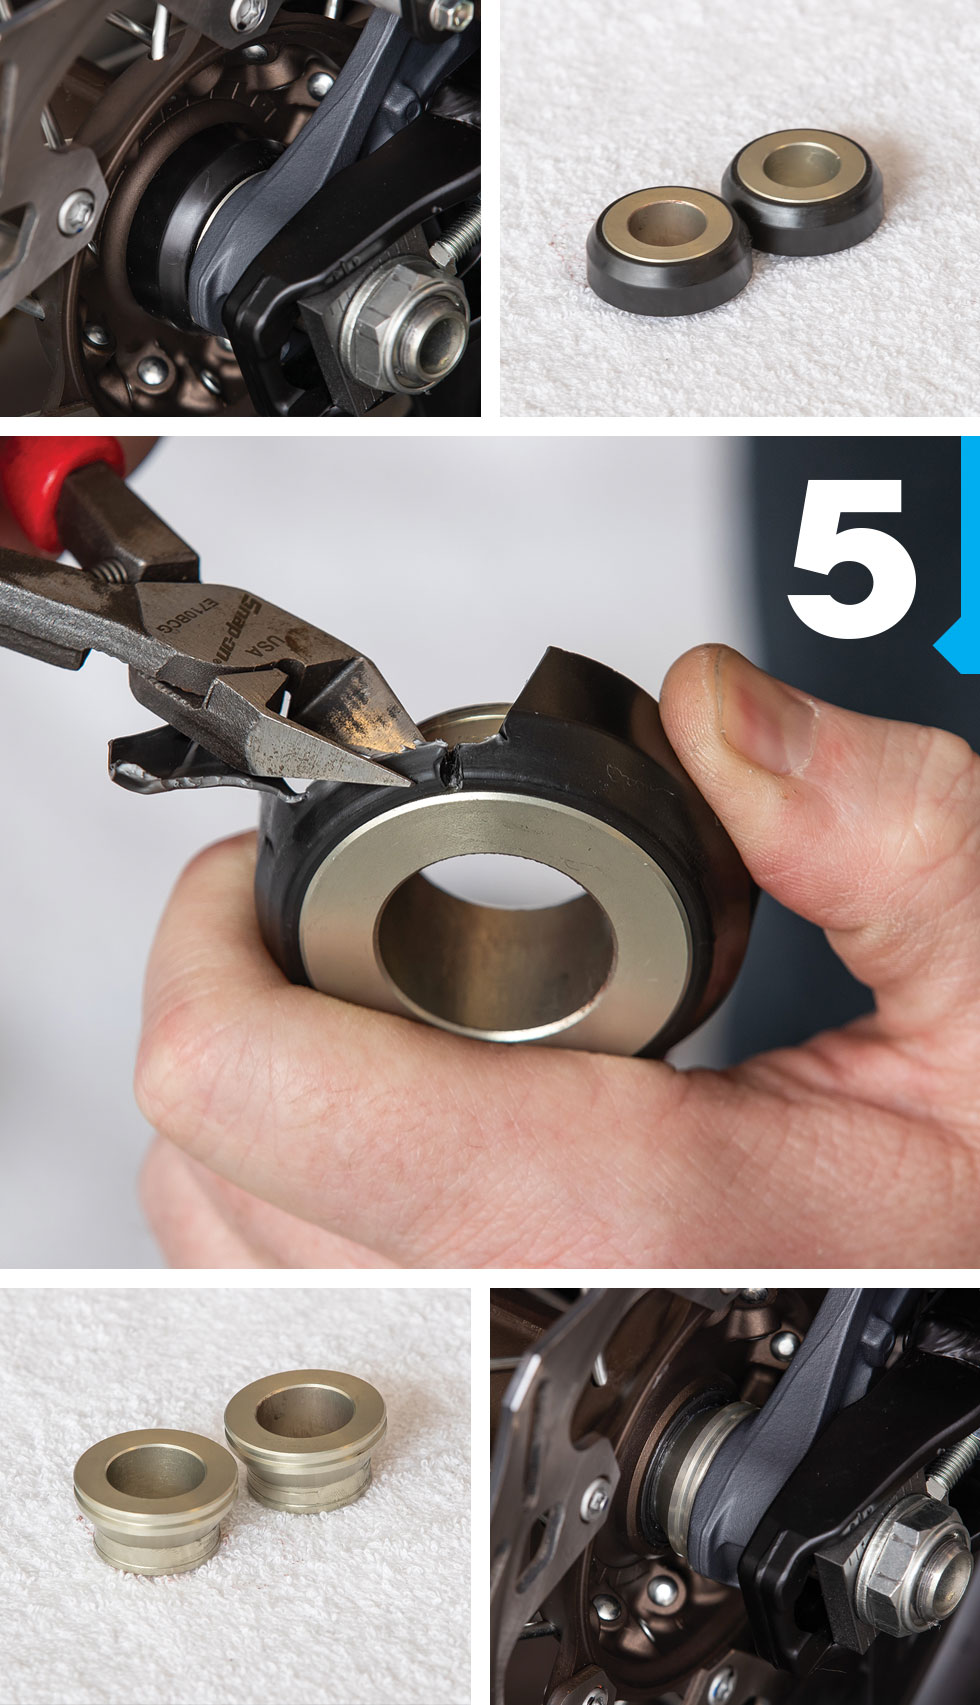
 Next we move down to the rear wheel spacers and eliminate the seal guard, a plastic sleeve that goes over the actual spacer. Removing it cuts weight and makes cleanup a little bit better too, allowing you to get in there and service the actual spacers a little bit easier. I don’t recommend taking those off for you GNCC guys or hardcore outdoor motocrossers—this one’s more for supercross, where we have a slight dust buildup, not mud and a lot of rocks.
 You can eliminate a lot of weight on the side panels by eliminating washers and flipping the collars around. Also, most bolts with a 10mm head can be switched out to 8mm. (The thread size will still be the same, as most of your side-panel bolts are 6mm by 1mm thread pitch.) Keep that the same and the 8mm head will work just fine.
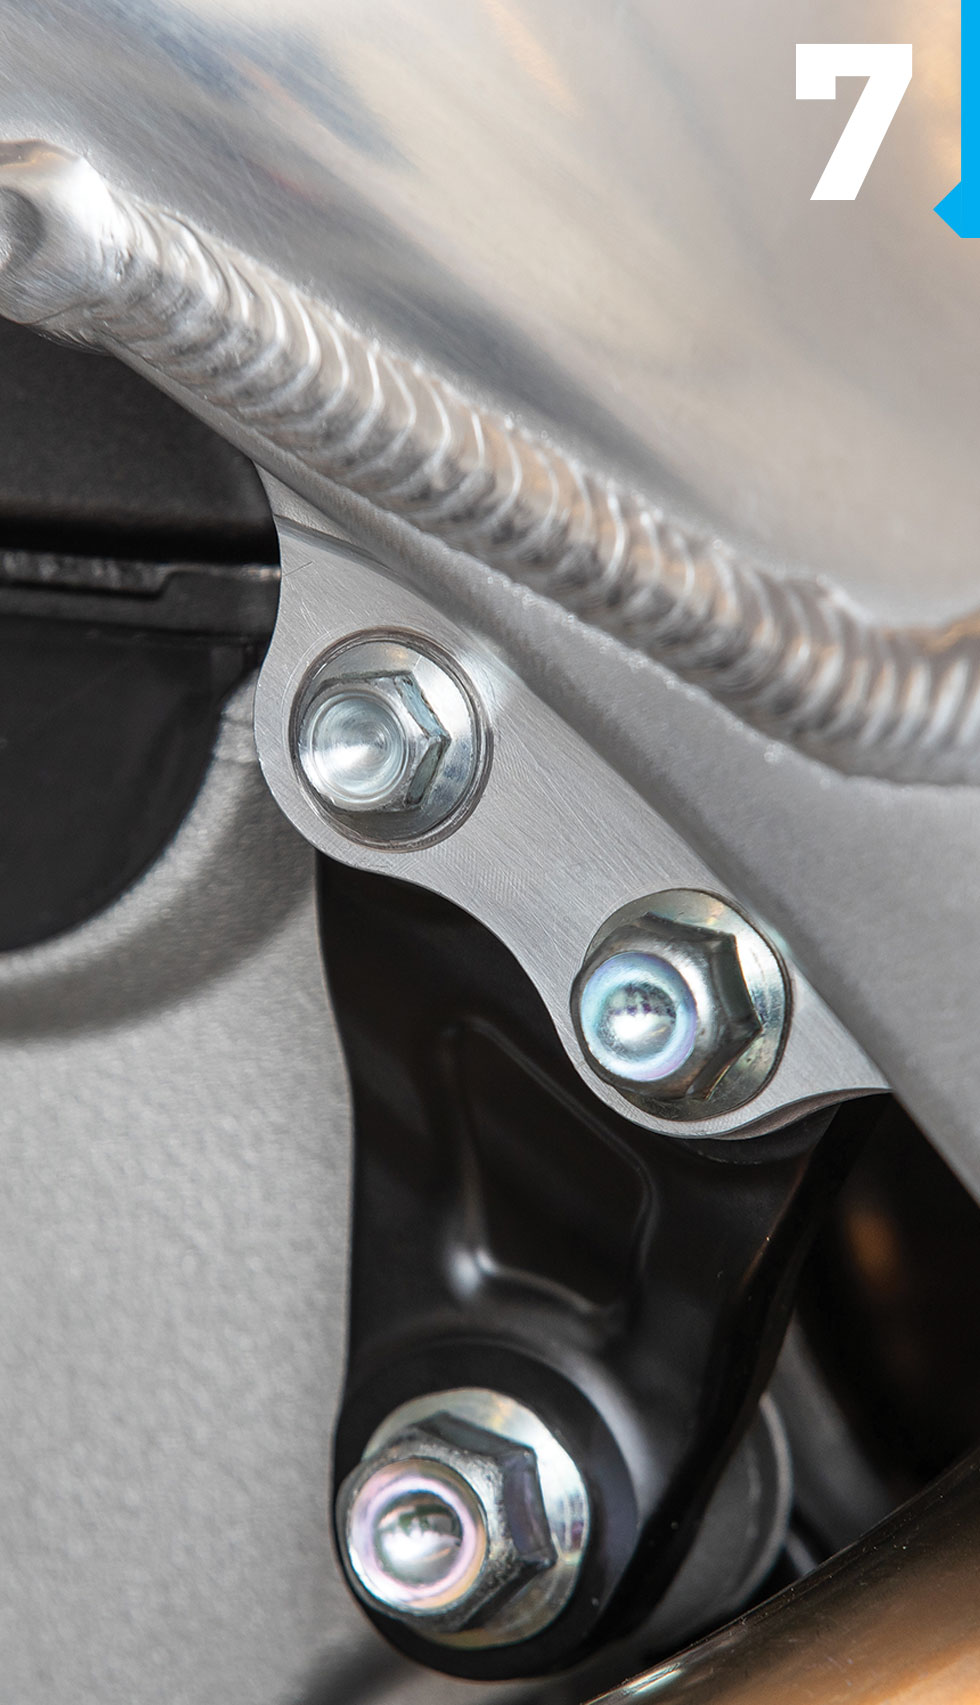
 Next, we did the head stay. Same thing: we went from a 12mm bolt head down to 10mm. (Those are 8 by 1.2mm thread pitch.) We went from a 12mm head down to 10mm again in four bolts just on the head stays alone, saving roughly four-tenths of an ounce.
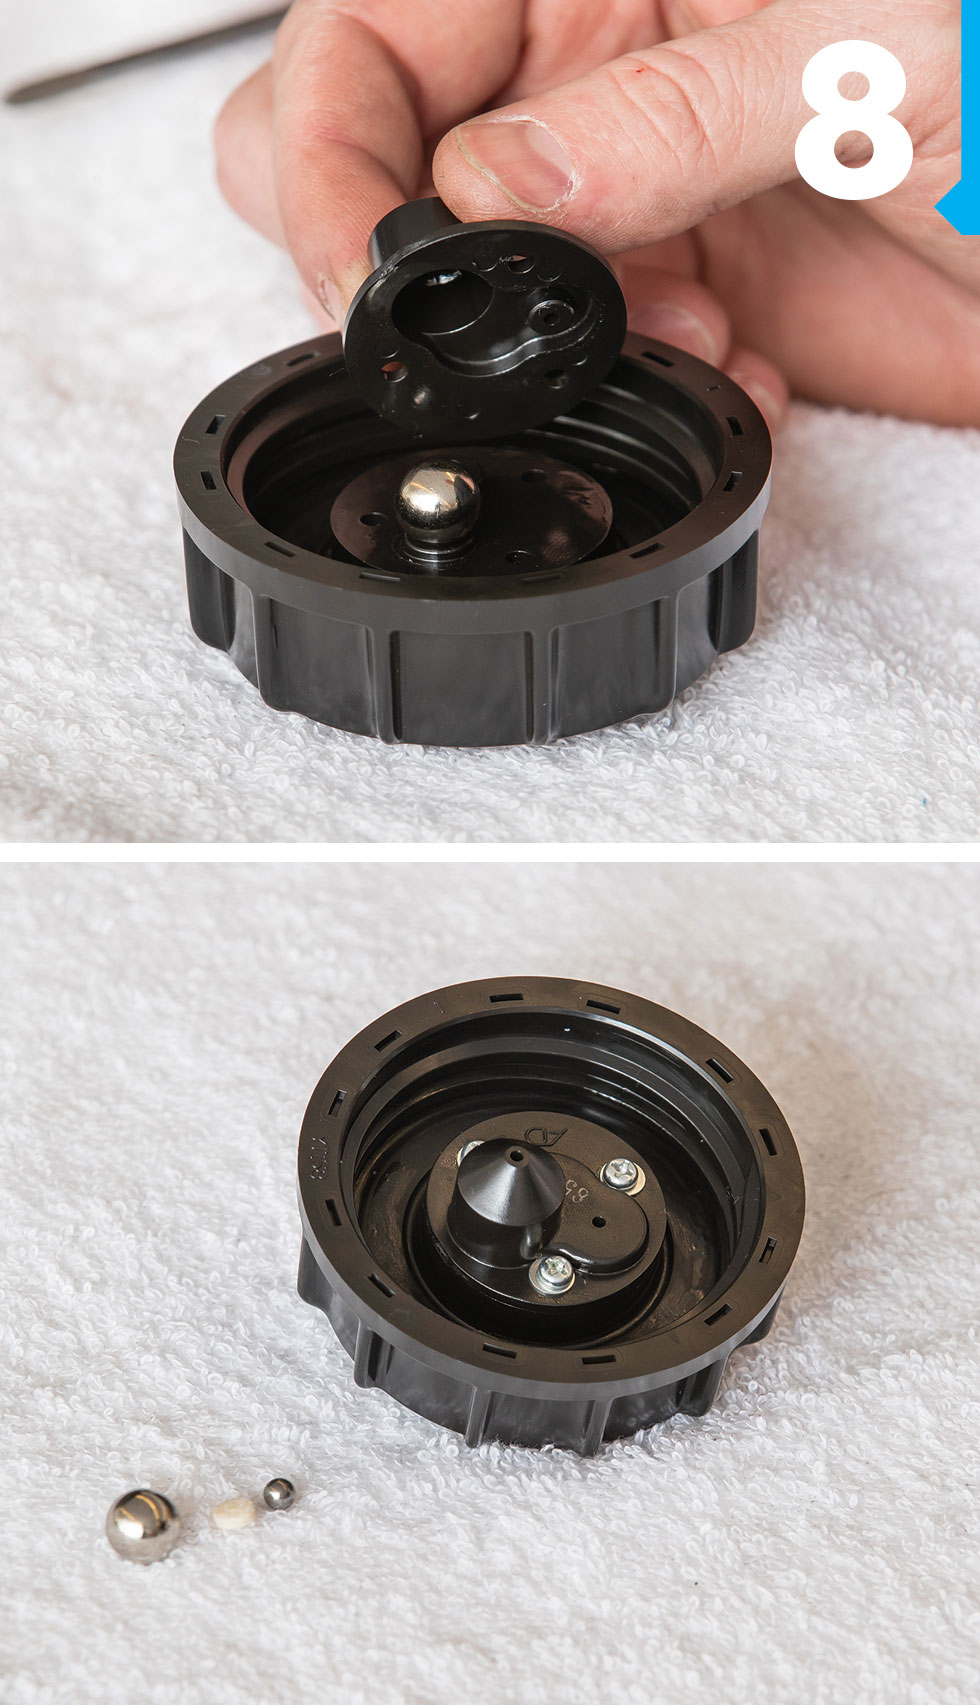
 For the gas cap, we removed the check ball. If you tip over, it’s designed to keep gas from pouring out the breather tube. Now, if you tip over a little, gas may come out, but the gas tank can breathe freely, and you do save a little weight there.
All in all, our tips here saved a quarter of a pound, which doesn’t seem like a lot, but if you start adding it up and doing a lot more—and then maybe use lighter tubes, a different tire tread design—it can make a difference. If the money is available, you can get a titanium bolt kit, Think Technology seat foam, lighter hubs, lighter triple clamps—a lot of things like that will really lighten a bike up, at or near the minimum weight limit. My 2014 race bike was 211.2 lbs. with a minimum weight limit of 212, so I had to add weight back! ![]()

